Geomarker Draw Controls
This section details the geomarker draw controls, accessible via the pen button placed in the bottom right corner of the navigation page.

Geomarker Draw Controls
Draw on map
The first option to create a geomarker is to draw it direcly on the map, with one of the following controls:
allows to draw a point on map. Click on this button, then click on the map at the desired location.
allows to draw a multi-line on map. Click on this button, then click on the map at the extrimities of your line(s). To end the draw, double click for the last point.
allows to draw a polygon on map. Same as for the multi-line.
allows to draw a circle on map. Click on this button, then click on the map to define the center of the circle. Move the pointer to draw the circle and finally click on the map to end the draw.
Once the drawing is ended, a popup shows up at the bottom of the navigation page. From this popup, the drawn geomarker can be customized.
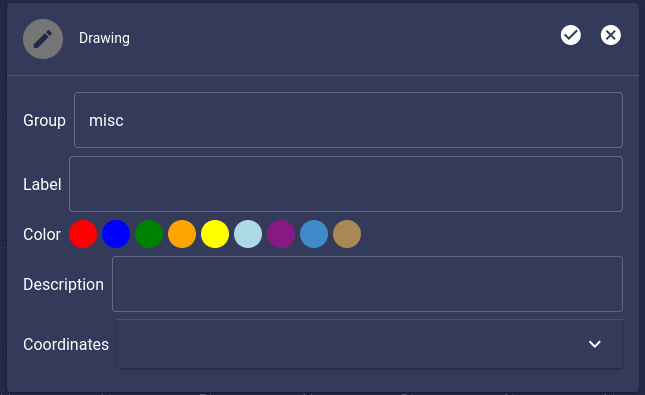
Geomarker Creation Popup
The following customization parameters are available:
Group: the group to which the geomarker will belong. If not specified, group is set to “misc” by default.
Label: a text value that will be displayed on the map aside the geomarker.
Color: the color of the geomarker.
Radius: for circles only, the radius can be customized after drawing the geomarker.
Description: a free text field that is not displayed on the map but can be viewed when clicking on the geomarker.
Coordinates: the coordinates of all points for each shape can be edited manually here.
To finalize the creation of the geomarker, click on  .
Click on
.
Click on  to cancel.
Once commited, the geomarker will be shared will all the instances of the current mission (ground + all belonging vehicles). If some vehicles are not yet connected to the ground, the geomarker will be resent upon vehicle connection.
Upload file
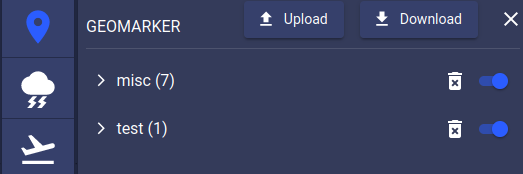
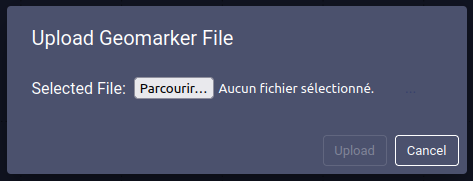
To add geomarkers on the map, the user also has the possibility to upload geomarkers from a file. This option is available in the geomarker nav control, on the left side of the dahsboard pannel.
Upload Geomarkers from File
When clicking on the  button, a menu opens to select
a file located on your device/computer.
button, a menu opens to select
a file located on your device/computer.
Upload Geomarker Menu
The file must be a geojson file (https://datatracker.ietf.org/doc/html/rfc7946) with a .json or .geojson extension, and comply with the following format.
{
  "type": "FeatureCollection",
  "features": [
    {
      "type": "Feature",
      "properties": {
        "label": "Point Example",
        "color": "purple"
      },
      "geometry": {
        "type": "Point",
        "coordinates": [15.46, 64.62]
      }
    },
    {
      "type": "Feature",
      "properties": {
        "label": "Line Example",
        "description": "This is a description example",
        "color": "red"
      },
      "geometry": {
        "type": "LineString",
        "coordinates": [
          [94.21, 72.285],
          [71, 62.26],
          [74.5, 45.3],
          [100.54, 54.977]
        ]
      }
    },
    {
      "type": "Feature",
      "properties": {
        "label": "Polygon Example",
        "color": "#2211aa"
      },
      "geometry": {
        "type": "Polygon",
        "coordinates": [
          [
            [-51.6, 50.95],
            [-1.75, 50.9],
            [-1.75, 72],
            [-51.6, 72.073],
            [-51.6, 50.95]
          ]
        ]
      }
    },
    {
      "type": "Feature",
      "properties": {
        "radius": 400,
        "label": "Circle Example",
        "color": "#50c878"
      },
      "geometry": {
        "type": "Point",
        "coordinates": [33, 31]
      }
    }
  ]
}
Note
As shown in the example file, a circle is a point with a radius defined in its properties.
For a LineString, points coordinates are set in an array, while for a Polygon, they are set in an array of array.
For the color property, it can be specified as a named color (red, blue, green, …) or as an hexa value.
Importing geomarkers from a file will put them all into a single group named with the name of the file.
Info/Edit/Delete
Clicking on a geomarker on the map opens a popup at the bottom of the navigation page.
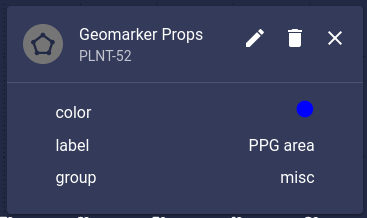
Geomarker Info Popup
This popup shows all the geomarker metadata and provides actions to edit/delete it.
 allows to edit an existing geomarker.
Once clicked, the popup switches to edition mode where all
the fields can be modified.
Click on to commit the edition and forward the modifications to all
the instances of the mission.
Click on to cancel the edition.
allows to edit an existing geomarker.
Once clicked, the popup switches to edition mode where all
the fields can be modified.
Click on to commit the edition and forward the modifications to all
the instances of the mission.
Click on to cancel the edition.
 allows to delete a geomarker. Once clicked, a confirm window
appears to validate the deletion. If validated, the deletion will be
forwarded to all the instances of the mission.
allows to delete a geomarker. Once clicked, a confirm window
appears to validate the deletion. If validated, the deletion will be
forwarded to all the instances of the mission.
 allows to close the geomarker popup.
The edition or deletion of a geomarker can also be done from the geomarker nav controls.
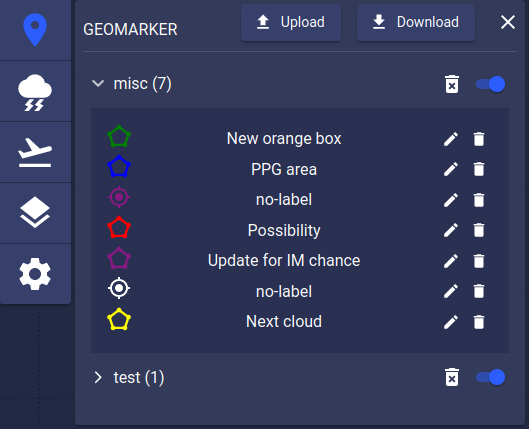
Actions from Geomarker Nav Controls
Hint
Shortcut
Double clicking on a geomarker on the map will directly switch it into edition mode.