Admin
The admin section gives access to the administration part for the application.
The section can be reached from the topbar by clicking on the
 button.
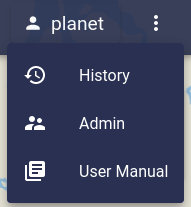
Admin section access
Caution
This section is only available for users with admin rights.
Admin view
The admin section is allows to manage three parts of the system:
missions
fleet
users


Important
Most of the administration is performed from the ground server.
On board instances, it is impossible to create/modify a mission or a new vehicle.
Only user management is available onboard. As already explained in the Get Access to PLANET section, users’ lists are not synchronised between board and ground instances. Thus users must be created and managed both onboard and on the ground.
Missions
This section allows to manage existing missions as well as create new ones.

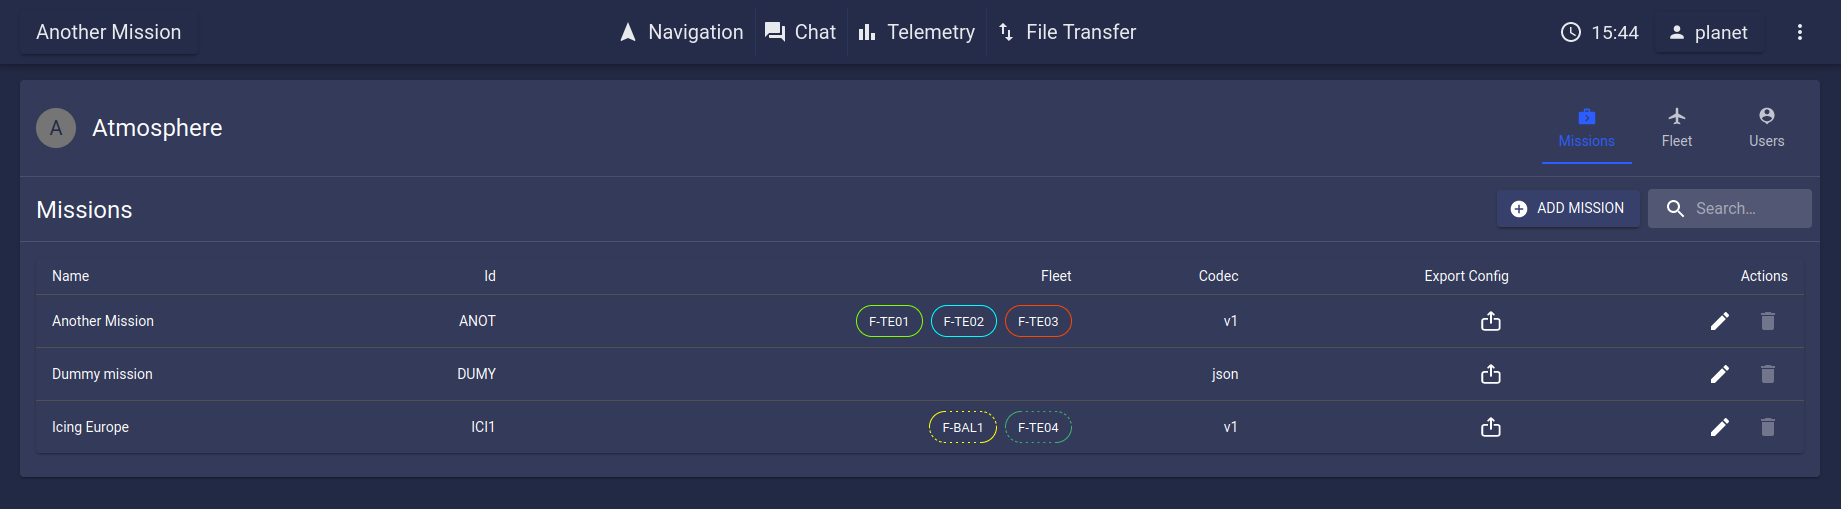
Missions table
The missions table contains the following columns:
name: the display name of the mission.
id: a unique identifier for the mission.
fleet: all the vehicles belonging to the mission.
codec: the codec used for the mission.
export config: a button which allows to export the current configuration of the mission.
actions: either edit or delete.
The  button allows to create a new mission.
When clicked, the following dialog box pops up.
button allows to create a new mission.
When clicked, the following dialog box pops up.
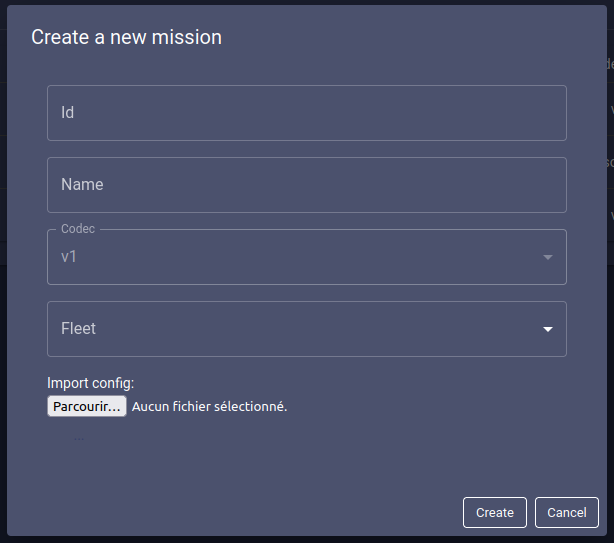
Create mission dialog
When creating a new mission, the following fields must be filled:
id: a string that will be a unique id for the mission. A valid id is a string between 4 and 14 of uppercase alphanumeric characters. If the set id is already used, an error message will be displayed when creating the mission.
name: a display name for the mission. This is a free string of 48 characters maximum.
codec: forced to v1. The codec defines how data exchanged between instances is encoded.
fleet: the list of vehicles belonging to the mission. This field can be left empty, and edited later. If a vehicle already belonging to another mission is selected, it will be switched on mission creation.
import config: a field that allows to import a config file for the mission. See Mission Configuration appendix for further details on mission configuration files. This field may be left empty as well and edited later.
When clicking on the  button for a specific mission,
a dialog popup similar to the creation popup will be displayed on
the screen. It is not possible to edit the mission id, but all other
fields can be modified.
button for a specific mission,
a dialog popup similar to the creation popup will be displayed on
the screen. It is not possible to edit the mission id, but all other
fields can be modified.
When clicking on the  button, a confirmation window
asking to write the mission’s ID will appear to confirm its deletion.
button, a confirmation window
asking to write the mission’s ID will appear to confirm its deletion.
Caution
Mission deletion is not distributed to the other instances or ground servers. As such, the deletion must be performed on each instances and ground server where the mission exists individually.
Fleet
This section allows to manage existing vehicles as well as create new ones.

Fleet table
The fleet table contains the following columns:
name: a display name for the vehicle. The color of the vehicle is deducted from its id and can’t be edited. Vehicles rounded with dashed lines are virtual vehicles.
id: a unique identifier for the vehicle.
kind: the kind of vehicle. May either be an aircraft, an UAV, a balloon, an airdropped_load or a rotorcraft.
mission: the mission to which it is currently belonging (may be left empty).
actions: either edit or delete.
The  button allows to create a new mission.
When clicked, the following dialog box pops up.
button allows to create a new mission.
When clicked, the following dialog box pops up.
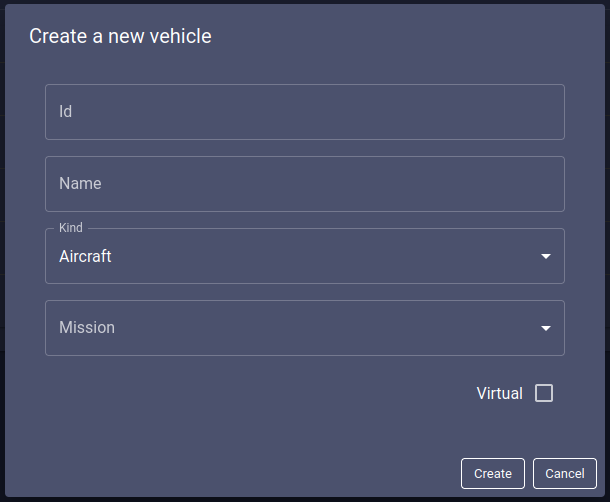
Create vehicle dialog
When creating a new vehicle, the following fields must be filled:
id: a string that will be a unique id for the vehicle. A valid id is a string between 4 and 14 of uppercase alphanumeric characters. If the set id is already used, an error message will be displayed when creating the vehicle.
name: a display name for the vehicle. This is a free string of 48 characters maximum.
kind: a dropdown menu to choose between aircraft, UAV, balloon, airdropped_load or rotorcraft.
mission: the mission to which it will belong. May be left empty and updated later.
virtual: a checkbox to define if the vehicle is virtual or not.
Virtual Vehicle
A virtual vehicle is a vehicle for which there is no onboard server. This is of interest when it is required to add other vehicles to be followed on PLANET ground interface, but their position comes from external sources.
For virtual vehicles, it is possible to push their positions following the specs defined in the Push Position API appendix.
For virtual vehicles, the ONLINE/OFFLINE information is disabled.
Note
Creating a vehicle will mainly be managed by ATMOSPHERE, especially for non virtual ones. However this may be of interest for users in some cases, for instance to add virtual vehicles to the system.
Good Practice
When creating a new vehicle, the id may be the serial number of its onboard PLANET server. This is not valid for virtual vehicles.
When clicking on the button for a specific vehicle,
a dialog popup similar to the creation popup will be displayed on
the screen. It is not possible to edit the vehicle id but all other
fields can be modified.
Clicking on the button will remove the vehicle.
A confirm box will pops up to confirm vehicle deletion.
Caution
Deleting a vehicle will remove permanently all data that has been created or intended for this vehicle from the database.
Users
This section allows to manage existing users as well as create new ones.

Users table
The users table contains the following columns:
username
status: may either be passive, user, admin or superuser.
last login: the last login date.
actions: either edit or delete.
The  button allows to create a new user.
When clicked, the following dialog box pops up.
button allows to create a new user.
When clicked, the following dialog box pops up.
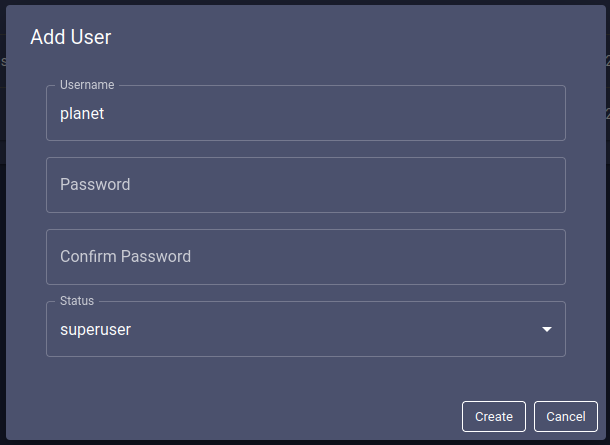
Create user dialog
When creating a new user, the following fields must be filled:
username: a string that must be uniquer. If the username already exists, an error message will be displayed when creating it.
password: few constraints must match for the password:
At least 8 characters.
Not too common.
Not too similar with the username.
confirm password: password confirmation.
status: type of user (passive, user, admin or superuser).
When clicking on the button for a specific user,
a dialog popup similar to the creation popup will be displayed on
the screen, to modify the concerned user.
Clicking on the button will remove the user.
A confirm box will pops up to confirm user deletion.
Caution
Deleting a user will remove permanently all the chat messages that have been created by this user from the database.
Important
Users’ lists are not synchronised between ground and onboard instances. Each list has to be administered independently.